
I love my jewelry pieces that showcase my kitties’ beautiful fur. I actually have several... Unlike the pet photobooks and the portraits I have of them, these jewelry pieces are a fashionable way for me to remember my loved ones every day, but in subtle ways. My preference is to have pieces that are less obviously pet memorials – kind of like they’re my little secret. I use them a touchstones to ground me. By looking at or touching them, I instantly transport my mind to good memories of their lives. Holding them close to my heart (literally!) in this way is a great comfort to me.
But I wasn’t satisfied with just encasing their fur in glass. I wanted a touchable pet keepsake that I could use to remind me of how wonderful it felt to pet and cuddle with them. So I created a crude but rather effective way to preserve my cats’ hair so that I could have the tactile interaction I so craved.
If you haven’t already, take a look at this article on how to clip and preserve pet fur for the basics. Then graduate yourself to the following technique for creating your own cuddle-able keepsake for memorializing your pet.
How to Use Sticky Paper to Create a Touchable Pet Hair Keepsake
Alright, it is a bit challenging to describe the intricate steps involved in the process of creating a pettable pet memorial, but hopefully this multi-step guide with the photos will do the trick.

Supplies You'll Need
- Sticky paper
- A pair of scissors
- Archival baggies
- Measuring tape or ruler
- Some ribbon
- Tape
1. Measure your archival storage bag
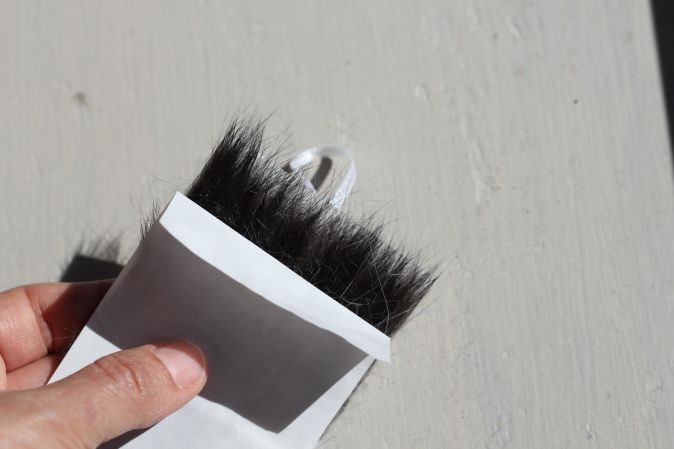
You’ll want your pet-able (or is it “pettable”?) keepsake to fit nicely inside of your archival plastic bag. Whether you’re using one with a zip top or not, it’s important that it fits securely so that the fur-lined sticky paper doesn’t slide around. You don’t want the hair to become matted or tangled because of friction. When I created mine, I used archival bags that were 10.8 cm x 8.3 cm (4.25” x 3.25”), which seemed like a nice size to me. If your archival bag is too large (for instance, you likely won’t want to cut enough of your pet’s fur to cover an entire 8 x 11 piece of paper!), I’d suggest cutting it down to size and closing the cut sides shut with either some tape or a food bag sealer.

2. Cut a piece of sticky paper to fit into your bag
Be sure to test to make sure it slides in and out relatively easily without having too much room to fit. Again, you want a nice snug marriage between the paper and the bag. DON’T remove any layers or the sticky baking yet!

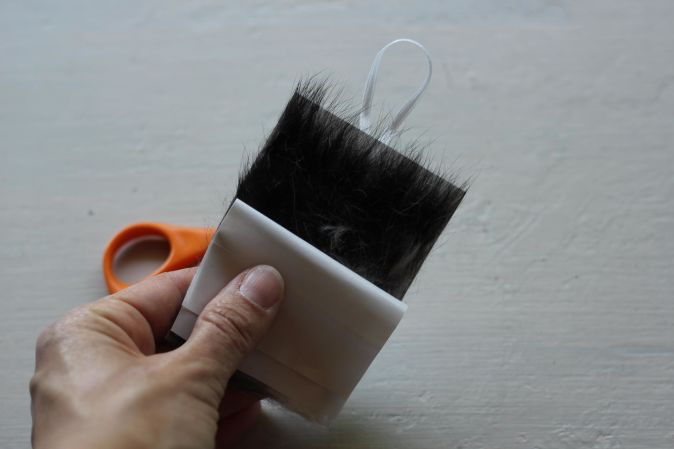
3. Attach a ribbon to the back side
First, figure out which side of your adhesive paper is actually the part with the stickiness on it. Now, on that side of the paper, attach a small ribbon handle. This will allow you to pull the finished keepsake in and out of the bag without damaging it in any way. I attached my ribbon with a bit of tape, but you could use archival glue or something similar. I wouldn’t recommend using a knot or anything too bulky – you want the whole thing to remain rather flat so that you don’t add unnatural kinks or bends to your pet’s hair.

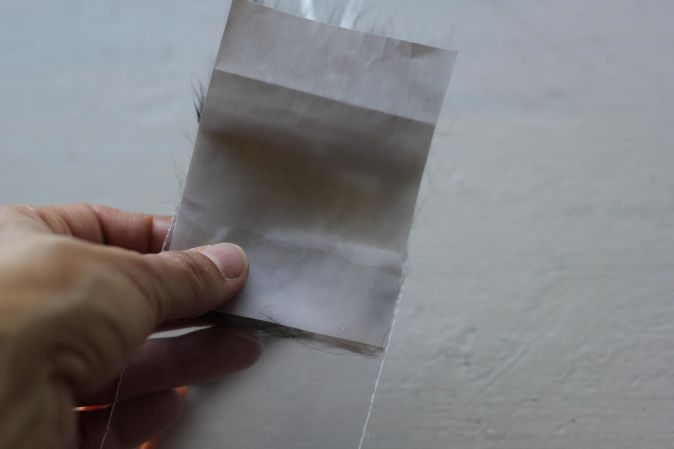
4. Peel back only a small portion of the covering paper
Do NOT peel back and/or remove the entire thing! This is super important. You only want to reveal a little bit of the sticky part of the paper – just enough to adhere the fur you currently have at hand. The depth of your first peel will depend on the length of your pet’s fur. The idea is that you will reveal enough tacky paper to place your pet’s fur with it just slightly hanging off the end of the paper. For Tia’s and Spart’s furs (they’re both shorthaired cats), I peeled back about 2 cm (0.75”) the first time.
5. Fold down the non-sticky part of the paper
Don’t touch the sticky part with your fingers! You want to maintain all the tackiness for adding your pet’s hair. But do fold down the non-sticky part so that you get it out of the way for the next step.
6. Carefully place one layer or row of your pet’s hair on the sticky paper, ends facing out
Starting at one side of the paper (not in the middle), spread out your pet’s hair. You want the cut side of the fur to be entirely on the sticky paper with the natural end of the hair hanging over the edge of the paper (on the ribbon side). Don’t pile it too thickly – you ideally want each hair to make contact with the sticky part of the paper so that you secure it in place. Press down on the fur to adhere it really well, gently moving it from side to side if you have it too thick to ensure each strand makes contact.
7. Continue along the top edge
If you have more fur to add, continue to add it to the exposed portion of the sticky paper. Do not expose any more of the sticky backing until you’ve covered the entire first row with fur. It’s totally fine if you don’t have enough fur for the entire length of exposed tackiness – just put down what you have.
8. Start the next row
If you have more pet fur to place, gently peel back a tiny bit more of the cover paper and fold it over. This time, you will want to expose a less-deep strip. You’re going to place the second row in the same orientation as the first row, but in such a way so that it overlaps the first row – just like your pet’s fur does in real life. Your goal is to adhere about 1 cm (0.5”) of the cut ends of the pet fur this time (i.e. you don’t need to adhere quite as much).

9. Keep like colours together
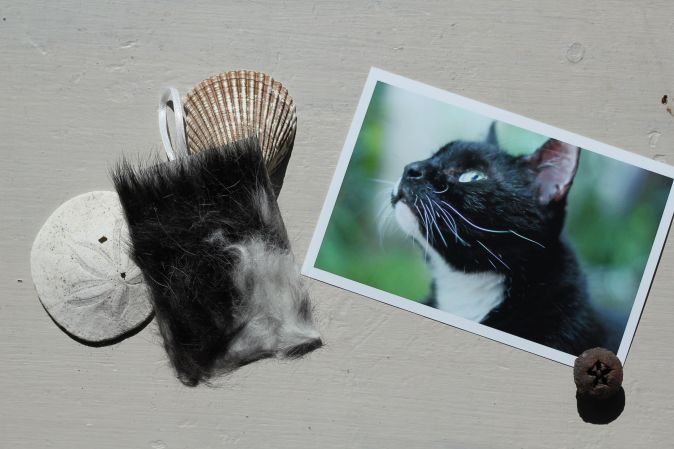
If your pet is multi-coloured, I’d recommend being strategic about how you organize the fur. Try to reproduce the types of colour groups you find on your dog or cat or rabbit by organizing your clipped fur by hue. This will make a much more pleasing and natural result than if you just place it all randomly. You can see I've put a bunch of Spart's white fur all in the same area surrounded by his black fur - just like his white bib.
10. Fold the cover paper back into place
When you’re done adding all the fur you have available, replace the cover paper to it’s original position. This will 1) protect the fur you just put down, and 2) protect any exposed sticky bits of the paper until you have more fur to cover it.
11. Slip your project into the protective plastic bag
Be sure to insert it with the ribbon end facing out so that you can easily slide it out again in the future. I would also recommend you placing the entire thing into an archival box with acid-free and lignen-free tissue paper to make sure the entire thing is as protected from the elements as possible.
12. Continue the process the next time you collect fur
The next time you clip more of your pet's fur, add it in the same fashion, only revealing new sticky bits of the paper when you have fur to cover it. Repeat until you have the entire card full of your pet fur.
---
I’d love to see the touchable pet keepsakes you’ve created with this method! You saw Spart's finished one above and below and Tia's at the top of this article. Please comment with pictures of your creations. Perhaps you can improve on my method! Or you could entrust me with your fur collection so that I can create a more stylized touchable pet keepsake like this one!
Please note: I have not put this method through long-term tests. I do have concerns that the sticky paper may degrade the pet fur over time, but since I have not had years to experiment, I cannot say one way or another whether this would be a concern.
Image: Maryruth
Affiliate Disclosure: There may be affiliate links on this page which help to pay for Tiny Pet Memories. If you make a purchase through a link I provide, thank you because it may allow me to earn a small commission at no additional cost to you. I am not paid to promote specific products. Any opinions I express are strictly my own.